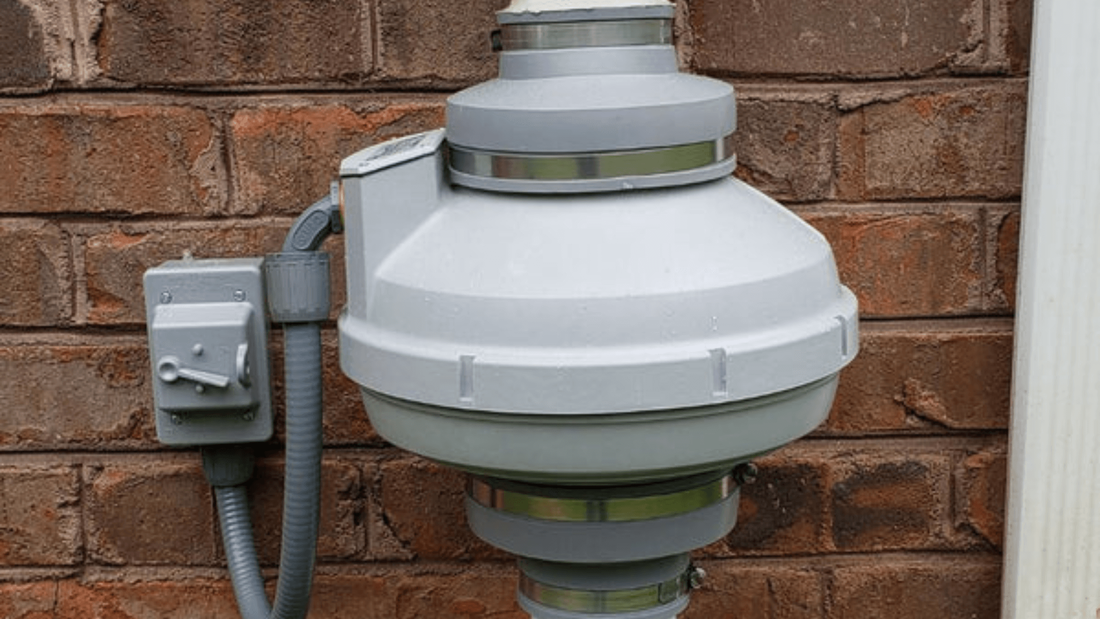
 resource:festaradontech.com Radon gas is a severe health risk that may be found in houses across the country. Addressing radon levels in your home is essential to protect yourself and your family from this silent threat. One effective method of mitigating radon is using a radon fan. But can I replace a radon fan myself? This guide will explore the DIY radon fan replacement process, providing the necessary steps and precautions to ensure your safety. Understanding Radon FanBefore we dive into the radon mitigation fan replacement process, let's take a moment to understand what a radon fan is and how it works. A radon fan is a crucial component of a radon mitigation system. It helps draw radon gas from below your home and safely vent it outside, reducing indoor radon concentration. Radon fans come in different types and sizes, including exterior-mounted fans and inline fans installed in the attic or crawlspace. Some fans operate continuously, while pressure sensors activate others. Understanding the type of fan you have will be important for replacement. Signs that Your Radon Fan Needs Replacement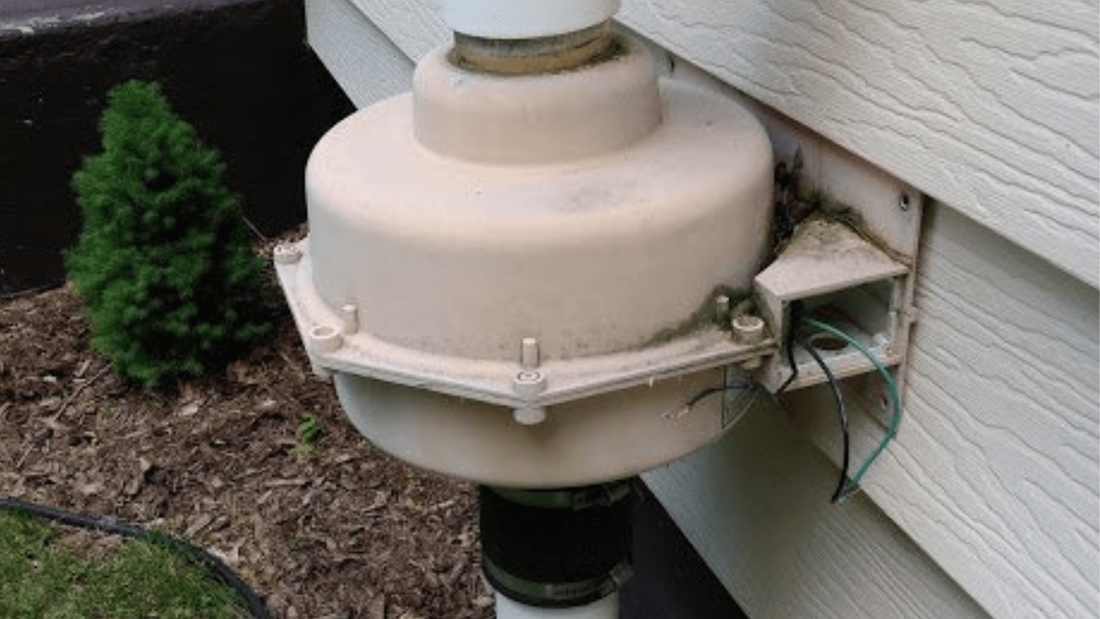 resource:syracuseradonmitigation.com Over time, radon fans can experience wear and tear, reducing their efficiency. Here are some signs that indicate it may be time to replace your radon fan:
Preparations for Fan ReplacementBefore starting the replacement process, making the necessary preparations is important. Here are the steps you should follow:
Step-by-Step Radon Fan Replacement Process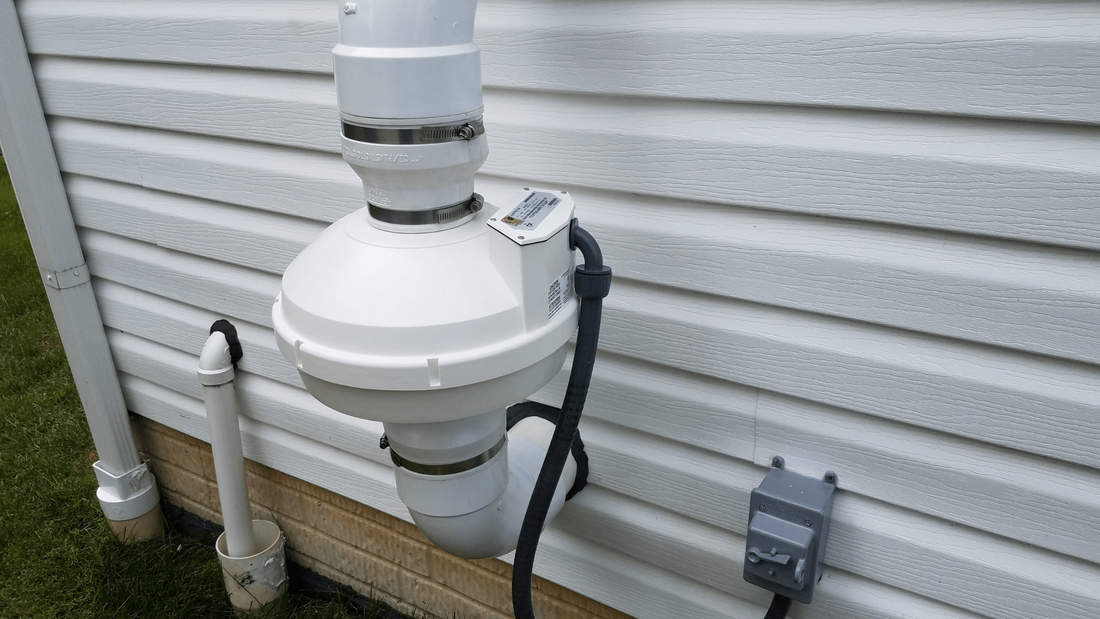 resource:storables.com Removing the Old Fan
Installing the New Fan
Tips for SafetyWhile changing a radon fan might be a do-it-yourself effort, safety should always come first. Observe the following advice:
Common Mistakes to AvoidEven if replacing radon fans on your own might save money, there are certain pitfalls to watch out for:
ConclusionWhile replacing a radon fan yourself might save money and be enjoyable, it's important to emphasize safety and adhere to the given guidelines. Your radon mitigation system will continue to work effectively with routine maintenance and replacement of your radon fan, keeping you and your loved ones safe from the hazards of radon gas. FAQsCan I install a radon fan myself?Professionals typically install a radon mitigation system for approximately $1,500, but you can do it yourself for only about $500 in supplies. Therefore, you can install your system in a weekend and save yourself $1,000 if you're reasonably handy and have some knowledge of carpentry, plumbing, and electrical systems. How long does it take to install a radon fan?Radon removal can be finished in a single day. An installation of a mitigation system typically takes three to five hours. How effective are radon fans?Systems to reduce radon are effective. Using radon-reducing features will often keep radon levels in dwellings below two pCi/l. A good radon mitigation system can reduce the amount of radon in your house by up to 99 percent. Is a radon fan loud?Every radon fan has a working motor and makes only a little noise. Replace your radon fan if the noise has gotten louder or started to sound crunching. Can a fan help reduce radon?In some circumstances, crawlspaces can be passively or actively ventilated using a fan to reduce radon levels. By lessening the home's suction on the ground and reducing the radon concentration underground, crawl space ventilation can lower indoor radon levels. What is the best location for a radon fan?The only locations suitable for fan placement are garages, attics, and the home's exterior. Crawl areas and basements are prohibited since they are part of the home's conditioned air space.
 Are you considering purchasing a home and unsure what a radon mitigation system is or whether the cost is worthwhile? You're in the correct place, then! In this article, you can find comprehensive information on radon mitigation systems. What is a Radon Mitigation System?A radon mitigation system is a collection of procedures to lower or eliminate the amount of radon gas in a structure or house. The method extracts radon gas from the ground around the building's foundation and safely directs it elsewhere. A qualified radon contractor in Portland usually installs radon mitigation systems. Types of Radon Mitigation SystemsTo lower the quantities of radon gas in a building, a variety of radon mitigation methods are available:
The best radon mitigation system will rely on the unique characteristics of the building, including the type of foundation, the amount of radon gas present, and other elements. A trained radon mitigation specialist can decide the ideal system for a certain building. Why Purchasing a Home With a Radon Mitigation System Is Beneficial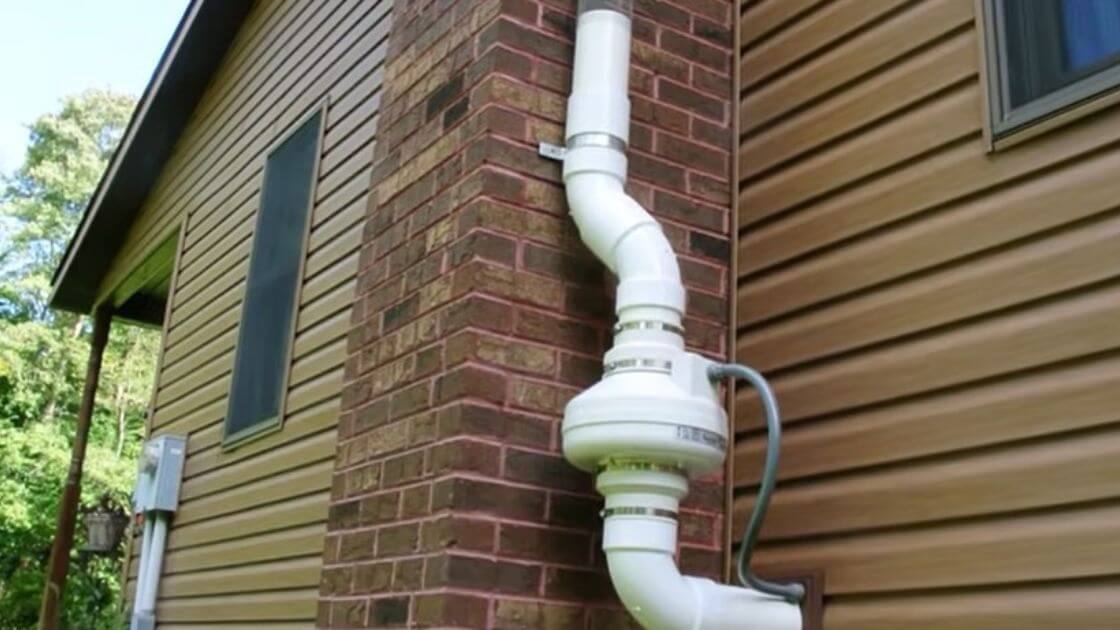 Improved Indoor Air QualityRadon gas can cause numerous health issues and significantly contribute to lung cancer when absorbed for long periods. A radon mitigation system can greatly reduce the amount of radon gas in your house, improving indoor air quality and lowering the risk of lung cancer and other respiratory diseases. Lower Radon LevelsIf you purchase a home with a radon mitigation system, you can be confident that the radon gas levels are within acceptable ranges. After buying the house, you won't need to worry about the additional cost of adding a mitigation system. Increased Home Value and Resale PotentialHomes with radon mitigation systems typically sell for more money than those without. This results from buyers actively looking for properties with installed radon mitigation systems as they become more aware of the risks of radon gas. Peace of Mind and Protection for Your Family's HealthKnowing that your house is safe and protected from the dangers of radon gas may put you at peace. Also, it is an excellent approach to safeguard your family's health, particularly if you have young children or elderly relatives residing in the house. The Cost of a Radon Mitigation SystemWhile purchasing a home with a radon mitigation system has obvious advantages, there are also expenses involved in installing and maintaining the system. Considering these expenses is crucial when deciding whether to purchase a house with a radon mitigation system. The Initial Cost of InstallationThe initial cost of installing a radon mitigation system might vary depending on the system type and the house size. The average cost of installation is between $1200 and $2500. The price could be greater if the house has a challenging foundation or if installing the system requires additional effort. However, this initial investment's long-term benefits include improved indoor air quality and family health protection. Maintenance and Operating CostsA radon mitigation system has ongoing maintenance and operational expenditures in addition to the initial cost of installation. Periodic maintenance is necessary for the system, including changing the air filter and inspecting the system for leaks. The typical annual maintenance cost might be between $100 and $200. The system might also need electricity, raising your monthly utility bill. The Cost of Not Having a Radon Mitigation SystemThe expense of not having a radon mitigation system might be far higher than the expenditures of installing and maintaining one. Radon exposure can cause major health issues, including lung cancer, and treating these conditions can be expensive. Also, not having a radon mitigation system might lower your home's resale value and make it more challenging to sell if you ever decide to put it up for sale. What to Think About Before Buying a Home With a Radon Mitigation SystemWhile purchasing a home with a radon mitigation system can have several advantages, there are other things to consider. These elements can aid in assessing the effectiveness of the mitigation system implemented and its ability to offer sufficient protection for you and your family. Radon Level in the HouseOne of the most important factors to examine when purchasing a home with a radon mitigation system is the amount of radon in the home. The location, soil type, and home construction style are just a few variables that might affect radon levels. Before making a choice, it's crucial to have a professional radon test performed to ascertain the radon levels in the home. Type of Mitigation System InstalledThe kind of mitigation system implemented is a crucial additional consideration. Sub-slab depressurization is one radon mitigation system that can lower radon levels in various ways. Ensure the mitigation system is installed correctly for the radon levels in the home and can successfully lower radon levels. Location and Proximity to Sources of RadonThe amount of radon in residence can also be influenced by its location and closeness to radon sources. For instance, radon levels in a home may be higher if it's close to a granite quarry or uranium mine. When choosing whether to purchase a home with a radon mitigation system, it's crucial to consider these variables. Your Personal Risk ToleranceWhen determining whether to purchase a home with a radon mitigation system, your individual risk tolerance is a crucial consideration. Even though the radon levels are low, if you or a family member has a history of lung cancer or other respiratory difficulties, you should consider a home with a mitigation system. On the other hand, you might not require a home with a mitigation system if you are not concerned about the health hazards linked to radon exposure. ConclusionRadon is a radioactive gas that can pose serious health risks, and it's important to take measures to protect your family from radon exposure. Purchasing a house with a radon mitigation system can provide several benefits, such as improved indoor air quality, lower radon levels, increased home value and resale potential, and peace of mind and protection for your family's health.
However, it's essential to consider factors such as radon levels in the house, the type of mitigation system installed, location and proximity to sources of radon, and your personal risk tolerance before making a decision. By considering these factors, you can make an informed decision about buying a house with a radon mitigation system and ensure that your family is protected from the risks of radon exposure.  Did you know that soil and rocks give off radon gas, a type of radioactive gas? It has no smell, color, or taste, making it hard to find without testing. Radon can cause lung cancer, killing about 21,000 people in the United States annually. Radon mitigation devices reduce the amount of radon in the air to a safe level. Read on to learn more. Why Radon Mitigation is ImportantRadon is known to cause lung cancer; after smoking, it is the second most common cause of lung cancer in the US. Tests are the only way to determine if a building has too much radon. If the radon levels are too high, a radon mitigation system should be implemented to lower them and ensure the air quality inside is safe. Understanding Radon and Its DangersRadon is a radioactive gas made when uranium breaks down. It has no color or smell, so it can build up in buildings and make people inside sick. Sources of Radon in HomesHomes can get radon from:
It's crucial to remember that not all homes have the same radon level, and even residences nearby can have significantly varying levels. You must have your home tested for radon to guarantee safe air quality. Impact of Radon Exposure on Health Radon exposure can result in serious health issues and even death. It is the second most typical cause of lung cancer in non-smokers and the most typical in smokers. The following are some ways that radon can be harmful to your health:
The consequences of radon on your health depend on how sensitive you are to it, how long and how much you are exposed to it. But over time, exposure to radon at any level can increase the risk of developing lung cancer. As a result, radon testing is crucial, and if the results show high levels, action should be taken. Guidelines for Safe Levels of Radon
Keep in mind that these guidelines are only recommendations to maintain the safety of the indoor air; they are not laws. Homeowners and property owners should take action to reduce radon levels if they exceed these recommendations. You'll be less likely to get lung cancer or experience other breathing issues. Advantages of Radon Mitigation Systems
Factors Affecting the Effectiveness of Radon Mitigation Systems
When choosing and installing a radon mitigation system, it's essential to consider these things to ensure the system works to lower radon levels and improve the air quality inside. Benefits of Proper Installation and MaintenanceIf a radon mitigation system is set up and taken care of correctly, it can help in many ways, such as:
Hiring a qualified professional to install and maintain the radon mitigation system is important to ensure you get these benefits. Maintenance and testing should also be done regularly to ensure the system works well and that radon levels stay low. Evaluating the Effectiveness of Radon Mitigation SystemsRadon mitigation systems are intended to lower radon levels in houses and other structures, but assessing their efficacy is crucial to ensure they're operating as intended. The first step in deciding whether a mitigation system is required is radon testing, and it's crucial to repeat the test after installation to ensure that the system is functioning properly. The US Environmental Protection Agency (EPA) advises radon testing at least every two years and more frequently if levels have been high in the past or if the structure or its ventilation system has undergone any alterations. The lowest habitable level of the house, such as the basement or a first-floor room, should be chosen for testing. Adherence to recognized testing protocols is crucial when assessing a radon mitigation system's efficacy. The Environmental Protection Agency (EPA) advises employing a qualified radon measurement expert or a radon measurement instrument that has passed the agency's testing procedure and is listed on its list. The effectiveness of radon mitigation systems is likewise subject to standards. The most widely accepted standard is the ANSI/AARST Procedure for Radon Mitigation Systems in Existing Low-Rise Residential Buildings, which outlines specific steps for determining a radon mitigation system's efficacy. ConclusionRadon is a serious health hazard affecting indoor air quality in homes and buildings. Mitigation systems effectively reduce radon levels, but their effectiveness depends on proper installation and maintenance. It is important to test for radon regularly and evaluate the effectiveness of mitigation systems to ensure they're working properly.
Radon mitigation is necessary to create a safe and healthy living or working environment. With the help of qualified radon professionals and adherence to established guidelines, mitigating the risks associated with radon can be a straightforward and effective process. |
SERVING ALL OF PORTLAND METRO & SURROUNDING AREAS |
|
